OVH Server Monitoring & Firewall

Ovh Use a perl script on their server to monitor system health. Its installed by default in their images, alternatively installed manually (instructions here).

To allow their monitoring in and out of the firewall you need to open some ports for them (important if you only allow specific traffic in or out through the firewall). An iptables configuration follows.

#!/bin/bash

/sbin/iptables -A INPUT -i eth0 -p tcp --dport 22 --source cache.ovh.net -j ACCEPT
/sbin/iptables -A INPUT -i eth0 -p icmp --source proxy.ovh.net -j ACCEPT
/sbin/iptables -A INPUT -i eth0 -p icmp --source proxy.p19.ovh.net -j ACCEPT
/sbin/iptables -A INPUT -i eth0 -p icmp --source proxy.rbx.ovh.net -j ACCEPT
/sbin/iptables -A INPUT -i eth0 -p icmp --source proxy.rbx2.ovh.net -j ACCEPT
/sbin/iptables -A INPUT -i eth0 -p icmp --source ping.ovh.net -j ACCEPT
/sbin/iptables -A INPUT -i eth0 -p icmp --source <>.250 -j ACCEPT # IP monitoring system for RTM
/sbin/iptables -A INPUT -i eth0 -p icmp --source <>.251 -j ACCEPT # IP monitoring system for SLA

/sbin/iptables -A OUTPUT -o eth0 -p udp --destination rtm-collector.ovh.net --dport 6100:6200 -j ACCEPT

If you use CSF, replace INPUT with ALLOWIN and OUPUT with ALLOWOUT. The above code can go in /etc/csf/csfpost.sh to get run everytime CSF reloads the firewall rules.

Ubuntu Two-Factor Login (public key + Google Authenticator)

The Google authenticator app adds an easy to use true two factor login (rather than just an extra password, I’m looking at you online banking). It is time limited and each code is valid one for 30 seconds, however this can be changed.

There are other guides out there which describe the setup but these follow the assumption that you will be using passwords to login rather than public keys.

This method is tested for Ubuntu 14.04.1 but will likely work for any distro that has a recent release of openssh (v6.6+). The following commands assume you are logged in as root, if not prefix with sudo.

First step is to install the authenticator.

aptitude install libpam-google-authenticator

Next, setup the authenticator for your login or root.

$ /usr/bin/google-authenticator

Do you want authentication tokens to be time-based (y/n) y
https://www.google.com/chart?chs=200x200&chld=M|0&cht=qr&chl=otpauth://totp/...

[QR CODE]

Your new secret key is: D3WF27FKWZA5TAO3 (not real :P)
Your verification code is 123456
Your emergency scratch codes are:
 12345678
 12345678
 12345678
 12345678
 12345678

Do you want me to update your "/home/sam/.google_authenticator" file (y/n) y

Do you want to disallow multiple uses of the same authentication
token? This restricts you to one login about every 30s, but it increases
your chances to notice or even prevent man-in-the-middle attacks (y/n) y

By default, tokens are good for 30 seconds and in order to compensate for
possible time-skew between the client and the server, we allow an extra
token before and after the current time. If you experience problems with poor
time synchronization, you can increase the window from its default
size of 1:30min to about 4min. Do you want to do so (y/n) n

If the computer that you are logging into isnt hardened against brute-force
login attempts, you can enable rate-limiting for the authentication module.
By default, this limits attackers to no more than 3 login attempts every 30s.
Do you want to enable rate-limiting (y/n) y

You’ll need to either scan the provided QR code via the authenticator app or follow the provided url.

Now you are enrolled in two-step authentication, congrats.

Next is to update PAM to accept Google Authenticator tokens. Update /etc/pam.d/sshd to include the follow at the top of the file (above @include common-auth).

#Google Authenticator
auth sufficient pam_google_authenticator.so

Sufficient is used rather than required here because required would prompt for the password after the code is entered which is not what we want as public keys are being used.

The final step is to setup the ssh server to accept public keys and allow keyboard interaction. Open /etc/ssh/sshd_config and make the following changes. But take a backup first.

# Add this if not present
PubkeyAuthentication yes
# This allows sshd to ask for the verification code 
# after the public key is accepted
AuthenticationMethods publickey,keyboard-interactive

# Change the following to yes, it is no by default
ChallengeResponseAuthentication yes
# Also disable password logins
PasswordAuthentication no
# This should be present, but add if not present
UsePAM yes

Now restart the ssh server.

service ssh restart

 Important: Don’t close your current session until you know the login is working correctly, as you may get locked out.

Time to test, open a new ssh connection to your box, you should now be greeted like this:

Using username "root".
Authenticating with public key "my-public-key" from agent
Further authentication required
Using keyboard-interactive authentication.
Verification code:

If this fails, you can restore the backup you made of the sshd config (you did make one?), remove the authenticator from the pam config. and restart ssh.

Google Authenticator Project: https://code.google.com/p/google-authenticator/
Authenticator App: Play Store | Apple App Store | Windows Phone

WebPasswd

webpasswd
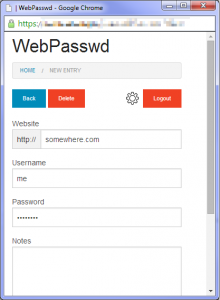
WebPasswd is a password app that I have been working on, its a self hosted PHP app, that stores usernames and password (along with notes) in an encrypted file.

I’ve released it under the MIT license and available on github at https://github.com/sam159/WebPasswd


PKCS#5 Padding with PHP

Here is a quick class for dealing with PKCS#5 style padding.

This padding is useful for encrypting data with DES/AES which have a multi-byte block size. MCrypt will by default pad out to the next block boundary with Null bytes which will show up in the decrypted data.

A good explanation can be found here.

class PKCS5Padding {
  public static function Pad($unpaddedString, $blockSize) {
    $additionalChars = $blockSize - strlen($unpaddedString) % $blockSize;

    $char = chr($additionalChars);

    return $unpaddedString.str_repeat($char, $additionalChars);
  }
  public static function UnPad($paddedString) {
    $additionalChars = ord(substr($paddedString, -1, 1));

    return substr($paddedString, 0, -$additionalChars);
  }
}

//Example use. $td is the resource returned by mcrypt_module_open
$paddedData = PKCS5Padding::Pad($data, mcrypt_enc_get_block_size($td));

Asus DSL-N55U Using VPN + DMZ

My ADSL router supports a built-in VPN server, but I also make use of the DMZ feature to expose my webserver without having to forward all the ports I need.

The problem I ran into is that the VPN traffic was forwarded to the DMZ host (feature or a bug?)

My resolution has been to port forward the VPN traffic back to the router. This involves adding forwarding to port 1723 TCP for PPTP control and 43 GRE (added as the ‘other’ protocol) and pointed both to the LAN IP of the router.

PHP: Dpi of a png image

I recently needed to determine the DPI of a set of PNG files (so that I could convert the size to points), with the exception of imagemagick there is no way to do this.

So here is a pure-php method of extracting the DPI from a PNG file, it searches for the pHYs chunk (which may or may not exist).

function read_png_dpi($source)
{
  $fh = fopen($source, 'rb');
  if (!$fh)
    return false;
  
  $dpi = false;
  
  $buf = array();
  
  $x = 0;
  $y = 0;
  $units = 0;
  
  while(!feof($fh)) {
    array_push($buf, ord(fread($fh, 1)));
    if (count($buf) > 13)
      array_shift($buf);
    if (count($buf) < 13)
      continue;
    if ($buf[0] == ord('p') &&
        $buf[1] == ord('H') &&
        $buf[2] == ord('Y') &&
        $buf[3] == ord('s'))
    {
      $x = ($buf[4] << 24) + ($buf[5] << 16) + ($buf[6] << 8) + $buf[7];
      $y = ($buf[8] << 24) + ($buf[9] << 16) + ($buf[10] << 8) + $buf[11];
      $units = $buf[12];
      break;
    }
  }
  
  fclose($fh);
  
  if ($x == $y)
    $dpi = $x;
    
  if ($dpi != false && $units == 1) //meters
    $dpi = round($dpi * 0.0254);
  
  return $dpi;
}

Htaccess Builder

Here is a new tool for creating those often frustrating .htaccess files. It has the catchy name of Htaccess Builder and has been created by yours truly.

It is still in beta (like all great web 2.0 things) and I am looking for input to improve and expand it.

At the time of writing you can (not an exhaustive list):

  • Mass redirect urls
  • Redirect domains
  • Map urls to an index file (for fancy/pretty urls)

It has a Uservoice page at https://htaccess.uservoice.com for any and all input, so please let me know what you think and what’s missing that you would like to see.

Spotify Notifier

Spotify is my music player of choice and naturally I want to be able to know what I’m listening to without bringing up Spotify.

At work this is no problem as macs have growl (yes, iMac at work :). At home I have a Windows machine, although while there is growl for windows, Spotify doesn’t use it :sadface:

Solution? Write my own notifier of course, made possible by the fact that Spotify has the current track in its window title.

Long story short, it does this:

Fades in, and fades out again when a new song is playing. It also remembers its position when closed.

Its not configurable, changes to fade speed, time etc. would need to be done in code.

Written in C# with VS2008, source available via GitHub.
ClickOnce install/launcher: ClickOnce (click launch rather than install)
Traditional Installer: SpotifierNotifier-1.0.1.2 (Zip) (RAR)

New in version 1.0.1 21/05/2012 (Thanks to Petter Östergren for suggesting improvements)

  • Popup can now be resized
  • Popup remembers position/size when moved rather than closed
  • Should not steal focus

Creating a RAID array

Specifically a soft Raid 1 array on ubuntu 11.10. This guide is not for raiding your boot/main drive, but rather an extra ‘data’ array.

First thing you will need is a computer/server with 2+ drives (that you don’t mind loosing the data on), the Raid mirror will end up being the smallest of the two. You may use/mix advanced format 4KB drives, but I’ll get to that later.
Continue reading

New programming slang

Source Linky

Some of my favourites:

Heisenbug
It is an error, which disappears or alters when it is attempted to be identified by analogy to Heisenberg uncertainty principle in quantum physics.

Reality 101 failure
The program (or more likely feature of a program) does exactly what was asked for, but when it’s deployed it turns out that the problem was misunderstood and the program is basically useless.

Protoduction
This is a prototype that ends up in production.

Megamoth
MEGA MOnolithic meTHod. Usually, it stretches over two screens in height and often contained inside aGod Object (an object that knows or does too much). Megamoths of greater size than 2k LOC have been sighted. Beware of the megamoth!